How to Make Herbal Balms for Soothing Relief

Before diving in, please note: This post is for informational purposes only. If you’d like to know more about how we approach topics, feel free to check out our friendly Disclaimer Page.
Hey there, amazing readers! 🖐️ Just a quick note: yes, we know there are a lot of ads here. Trust us, we get it—it’s not the prettiest look, but they help us keep this blog alive and kicking. Those pesky little ads cover the costs of all the behind-the-scenes magic, from hosting and tech stuff to creating content we hope you’ll love.
We’re committed to delivering quality posts, and your support (even just sticking around despite the ads) means everything to us. So, bear with us, and thanks for helping us keep the good vibes rolling. Now, on to the fun stuff! 😉
TRANSLATE BUTTON AT THE END OF THE ARTICLE
A Quick Overview
Herbal balms have a special place in the realm of natural remedies.
They can soothe aching muscles, calm irritated skin, and offer a comforting scent that lifts the spirits.
The process of making these balms is not only rewarding but also allows you to tap into the power of nature’s bounty.
With a bit of knowledge and a dash of creativity, you can craft your own herbal balms that offer soothing relief.
Ready to join me on this aromatic adventure?
Let’s dive right in!
Introduction to the World of Herbal Balms and Relief
Have you ever found yourself in need of a little soothing magic?
Maybe you’ve experienced a long day of gardening that left your muscles aching, or perhaps you’ve dealt with the annoyance of dry, cracked skin.
Herbal balms are like little jars of love that can help with these everyday woes.
They’re essentially concentrated blends of beneficial herbs and oils, packed with natural nutrients that can provide relief in various ways.
Using herbal balms is like having a mini first-aid kit in your pocket.
You can apply them to sore spots, dry patches, or even just to enjoy a calming aroma.
Each ingredient in your balm has its own unique properties that contribute to the overall effect.
By making your own, you get to choose which ingredients to include, allowing for a personalized touch that store-bought options often lack.
Creating herbal balms can feel like a delightful science experiment.
You’ll notice how scents combine, how oils meld together, and how the final product forms.
It’s a sensory experience!
Plus, the sense of accomplishment when you use something you’ve crafted yourself is unmatched.
So, let’s get started on this journey to making your own herbal balms!
Gathering Your Ingredients: Nature’s Best Healers
The first step in crafting herbal balms is gathering the right ingredients.
Mother Nature has provided us with a plethora of herbs known for their soothing properties.
Here’s what you might consider including:
Carrier Oils: These are the base of your balm.
Popular choices include olive oil, coconut oil, or sweet almond oil.
They’re nourishing and provide a smooth application.
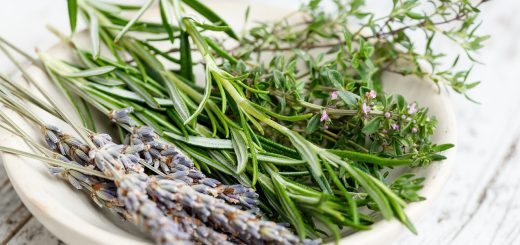
Herbs: Look for dried herbs like calendula, chamomile, or lavender.
These herbs are renowned for their calming effects and skin-healing properties.
Waxes: Beeswax is a common choice as it helps to solidify your balm and provides a protective barrier for your skin.
Plant-based alternatives like candelilla wax can be used for a vegan option.
Discover the "Healing Power of Herbs" 🌿
Essential Oils: For added benefits and fragrance, consider oils like tea tree, peppermint, or eucalyptus.
Just a few drops can enhance your balm significantly.
Vitamin E Oil: Adding a bit of this oil acts as a natural preservative and is great for your skin.
Making a list of what you want to include will help you avoid the last-minute scramble.
It’s like preparing for a party; the more organized you are, the smoother it will go.
Essential Equipment for Crafting Herbal Balms at Home
Before you start mixing and melting, let’s gather some essential tools.
You don’t need a fancy lab setup, just some basic kitchen items will do the trick:
Double Boiler: This is perfect for gently melting your ingredients without burning them.
If you don’t have one, a heatproof bowl over a pot of simmering water works just fine.
Measuring Cups and Spoons: Precision helps in getting the right consistency.
Mixing Spoon: A wooden or silicone spoon is great for blending ingredients together.
Glass Jars or Containers: These will be your balm holders.
Choose small jars for easy use and storage.
Strainer or Cheesecloth: If you’re infusing oils with herbs, you’ll need something to separate the plant material from the oil.
Labels: Don’t forget to label your balms!
It’s fun to get creative, and you’ll appreciate knowing what’s inside at a glance.
Having everything ready before you start is key.
It’s like having a recipe in your hands; it makes the whole process smoother and more enjoyable.
Popular Herbs for Soothing Balms: A Quick Overview
Choosing the right herbs is crucial for crafting a balm that truly soothes.
Here are some of my favorites:
Lavender: Known for its calming scent, lavender is fantastic for stress relief.
It also has antiseptic properties, making it great for minor cuts and scrapes.
Calendula: This vibrant flower is a powerhouse for skin healing.
It helps with inflammation and promotes cell regeneration.
Chamomile: Another calming herb, chamomile is perfect for sensitive skin.
It helps to reduce redness and irritation.
Peppermint: This herb adds a refreshing touch.
It’s great for headaches and muscle tension, providing a cooling sensation.
Comfrey: Rich in allantoin, comfrey is excellent for promoting tissue healing.
It can be beneficial for bruises and sprains.
With these herbs in your toolkit, you’re already on your way to creating balms that not only smell delightful but also pack a punch in the healing department.
Step-by-Step Guide: Infusing Oils with Herbal Goodness
Now for the fun part: infusing your oils!
This process extracts the beneficial properties of the herbs into your carrier oil.
Here’s how to do it:
Choose Your Oil: Start with your carrier oil of choice.
Olive oil works well, but coconut oil adds a nice texture.
Discover the "Healing Power of Herbs" 🌿
Prepare Your Herbs: If you’re using dried herbs, crush them slightly to release their oils.
Fresh herbs can also be used, but they contain more water, which can spoil your oil.
Combine in a Double Boiler: Measure out your oil and herbs, then combine them in your double boiler.
Use about 1 cup of oil to 1/4 cup of dried herbs.
Heat Gently: Allow the mixture to heat on low for 1-3 hours.
Stir occasionally and watch closely to avoid burning.
Strain the Mixture: Once infused, use a strainer or cheesecloth to separate the herbs from the oil.
Discard the herbs (or compost them) and keep the infused oil.
Infusing oils can seem like a lengthy process, but it’s worth the wait.
The resulting oil will be rich in the herbal goodness you seek.
Choosing the Right Base: Waxes and Butters Explained
Now that you have your infused oil, it’s time to choose the right base for your balm.
Waxes and butters are essential for achieving a smooth consistency.
Here’s a breakdown:
Beeswax: This natural wax helps to thicken your balm and keep it solid at room temperature.
It also provides a protective barrier on the skin.
Candelilla Wax: A vegan alternative to beeswax, candelilla wax has similar properties and helps in solidifying the balm.
Shea Butter: This butter is incredibly moisturizing and adds a luxurious feel.
It’s great for dry skin and works well in balms.
Cocoa Butter: If you love chocolate, you’ll appreciate cocoa butter’s delightful scent.
It’s nourishing and offers a firm texture.
When choosing your base, think about the desired consistency and how you want the balm to feel on your skin.
A blend of wax and butter often provides the best results, balancing firmness with spreadability.
Adding Essential Oils: Boosting Your Balm’s Benefits
Once you have your infused oil and wax ready, it’s time to add essential oils.
These concentrated extracts enhance both the therapeutic properties and the fragrance of your balm.
Here’s how to do it:
Select Your Oils: Depending on your goals, you might choose calming oils like lavender for relaxation or invigorating oils like eucalyptus for a refreshing boost.
Calculate Dosage: A good rule of thumb is to add about 15-20 drops of essential oil per ounce of balm.
Adjust based on your preferences, but keep in mind that essential oils are potent!
Mix Thoroughly: After melting your wax and infused oil together, remove from heat and stir in your essential oils.
This is where the aroma starts to shine!
Test the Scent: Before pouring, give the mixture a quick sniff.
You can always adjust by adding more essential oil if you desire a stronger fragrance.
Adding essential oils can transform your balm from ordinary to extraordinary.
The right blend can evoke memories, uplift moods, and bring a sense of tranquility.
The Art of Balancing Scents: A Cheerful Touch
Creating a perfectly balanced scent can be an art form.
When blending essential oils, think about how they complement each other:
Top Notes: These are the scents you smell first.
Citrus oils like lemon or orange are great fresheners.
Middle Notes: These form the heart of your balm.
Floral oils like geranium or rose can add a lovely depth.
Base Notes: The deeper scents that linger.
Think sandalwood or cedarwood for a grounding touch.
Experimenting with different ratios can lead to delightful discoveries.
Consider keeping a notebook of your favorite blends.
Who knows?
You might stumble upon a combination that becomes a signature scent for your homemade balms!
Mixing and Melting: Creating the Perfect Balm Blend
When it comes to making your balm, the mixing and melting stage is where the magic truly happens.
Here’s how to ensure a smooth, consistent balm:
Melt Your Waxes: In your double boiler, melt the beeswax or candelilla wax until it’s fully liquefied.
Add Infused Oil: Once the wax is melted, slowly pour in your infused oil while stirring.
This helps to combine the ingredients seamlessly.
Monitor Consistency: The mixture should be thick but pourable.
If it’s too thick, you can always add a bit more infused oil.
If it’s too thin, melt some more wax to mix in.
Remove from Heat: Once combined, take the mixture off the heat.
Be cautious; it can be quite hot!
Add Essential Oils: Stir in your essential oils after the mixture has cooled slightly to preserve their therapeutic properties.
Getting the right consistency is crucial for a balm that glides smoothly onto your skin.
Don’t rush this step; take your time to achieve a lovely blend.
Pouring and Setting: Tips for a Flawless Finish
Now that you’ve mixed your balm, it’s time to pour and let it set!
Here are some tips to ensure a flawless finish:
Prepare Your Containers: Make sure your jars or tins are clean and dry.
A quick wipe with rubbing alcohol can help sterilize them.
Pour Slowly: Carefully pour the balm mixture into your containers.
Go slow to avoid spills, and use a funnel if necessary.
Cool at Room Temperature: Allow the balm to cool and set at room temperature.
Avoid placing it in the fridge, as this can create a grainy texture.
Check Consistency: After a few hours, check the balm.
It should be firm but still pliable.
If it’s too soft, you can remelt it and add more wax.
Be Patient: Let the balm sit for at least 24 hours before using it.
This allows the scents to meld and the consistency to stabilize.
The moment you pour your balm is truly satisfying.
Watching it transform from a hot liquid to a solid masterpiece is a joy!
Storage Solutions: Keeping Your Herbal Balms Fresh
Proper storage is key to maintaining the quality of your herbal balms.
Here are some tips to keep them fresh:
Choose the Right Containers: Opt for dark glass jars to protect your balm from light.
This helps preserve the essential oils’ potency.
Store in a Cool, Dry Place: Heat and moisture can degrade the quality of your balm.
A cool cupboard is ideal.
Label Clearly: Write the date you made the balm and the ingredients.
This way, you can keep track of freshness.
Check for Changes: Regularly inspect your balms for any changes in scent or texture.
If something seems off, it’s best to discard it.
Enjoy Them Within a Year: Most balms can last up to a year if stored correctly.
However, the sooner you use them, the better!
Taking care of your balms means you can enjoy their soothing effects for longer.
Plus, it makes them perfect for sharing!
Enjoying and Sharing: Spreading the Soothing Love!
Now that you’ve crafted your own herbal balms, it’s time to enjoy and share the love!
Here are some fun ideas:
Personal Use: Keep a balm handy in your bag for everyday use.
It’s great for quick relief on the go!
Gifts: Homemade balms make thoughtful gifts.
Package them in pretty jars with personalized labels.
Host a Balm-Making Party: Gather your friends for a fun afternoon of crafting.
Everyone can create their own unique blends!
Share Recipes: Don’t keep your newfound knowledge to yourself!
Share your recipes and tips with friends and family.
Experiment Further: The world of herbal balms is vast.
Feel free to tweak your recipes, explore new herbs, and make it your own.
Sharing your herbal creations not only spreads joy but also fosters connections with others.
Who wouldn’t appreciate a little love in a jar?
Conclusion
Crafting herbal balms for soothing relief is a delightful journey that blends nature’s gifts with a touch of creativity.
From selecting your ingredients to pouring your final creation, every step is an opportunity to connect with the healing powers of the earth.
As you explore the various herbs, oils, and techniques, you’ll find that each balm tells its own story.
So, roll up your sleeves, let your imagination run wild, and enjoy the soothing love you can create.
Happy crafting!

The Enlightenment Journey is a remarkable collection of writings authored by a distinguished group of experts in the fields of spirituality, new age, and esoteric knowledge.
This anthology features a diverse assembly of well-experienced authors who bring their profound insights and credible perspectives to the forefront.
Each contributor possesses a wealth of knowledge and wisdom, making them authorities in their respective domains.
Together, they offer readers a transformative journey into the realms of spiritual growth, self-discovery, and esoteric enlightenment.
The Enlightenment Journey is a testament to the collective expertise of these luminaries, providing readers with a rich tapestry of ideas and information to illuminate their spiritual path.
Our Diverse Expertise 🌟
While our primary focus is on spirituality and esotericism, we are equally passionate about exploring a wide range of other topics and niches 🌍📚. Our experienced team is dedicated to delivering high-quality, informative content across various subjects ✨.
To ensure we provide the most accurate and valuable insights, we collaborate with trusted experts in their respective domains 🧑🏫👩🏫. This allows us to offer well-rounded perspectives and knowledge to our readers.
Our blog originally focused on spirituality and metaphysics, but we’ve since expanded to cover a wide range of niches. Don’t worry—we continue to publish a lot of articles on spirituality! Frequently visit our blog to explore our diverse content and stay tuned for more insightful reads.
Discover the "Healing Power of Herbs" 🌿
Unlock the ancient wisdom of herbal remedies with this comprehensive guide! Perfect for beginners and enthusiasts alike, this e-book dives into the powerful benefits of herbs for health, wellness, and natural healing.
Inside, you’ll find:
Easy-to-follow recipes for teas, tinctures, and remedies.
A guide to the most effective herbs for common ailments.
Tips on growing and storing your own herbs.
Transform your health naturally and embrace the healing power of nature. 🌱 Start your journey today!


