
DIY Halloween Decorations That Look Expensive
Before diving in, please note: This post is for informational purposes only. If you’d like to know more about how we approach topics, feel free to check out our friendly Disclaimer Page.
Hey there, amazing readers! 🖐️ Just a quick note: yes, we know there are a lot of ads here. Trust us, we get it—it’s not the prettiest look, but they help us keep this blog alive and kicking. Those pesky little ads cover the costs of all the behind-the-scenes magic, from hosting and tech stuff to creating content we hope you’ll love.
We’re committed to delivering quality posts, and your support (even just sticking around despite the ads) means everything to us. So, bear with us, and thanks for helping us keep the good vibes rolling. Now, on to the fun stuff! 😉
TRANSLATE BUTTON AT THE END OF THE ARTICLE
Halloween decorating can get surprisingly expensive.
You walk into a store planning to buy one cute pumpkin, and twenty minutes later you’re considering a decorative raven, six velvet pumpkins, an enormous haunted mansion, three candleholders, and a skeleton named Gerald.
We’ve all been there.
The good news is that creating a stylish Halloween home doesn’t require a designer decorating budget. In fact, some of my favorite Halloween decorations can be made from inexpensive craft supplies, thrift-store finds, ordinary household items, and things collected from nature.
The real trick is not necessarily what you use. It’s how you finish and style it.
Matte paint can make cheap plastic look sophisticated. A thrifted glass vase can become an antique-inspired Halloween centerpiece. Basic pumpkins look completely different when they’re painted in muted colors. Even cardboard can become surprisingly beautiful when texture, scale, and lighting are used carefully.
If you love Halloween decor but prefer something that looks polished rather than overly crafty, these 25 DIY Halloween decorations that look expensive are packed with ideas you can recreate at home.
Some are moody. Some are cozy. A few are wonderfully spooky.
And most importantly, they won’t require us to sacrifice November’s grocery budget to the Halloween aisle.
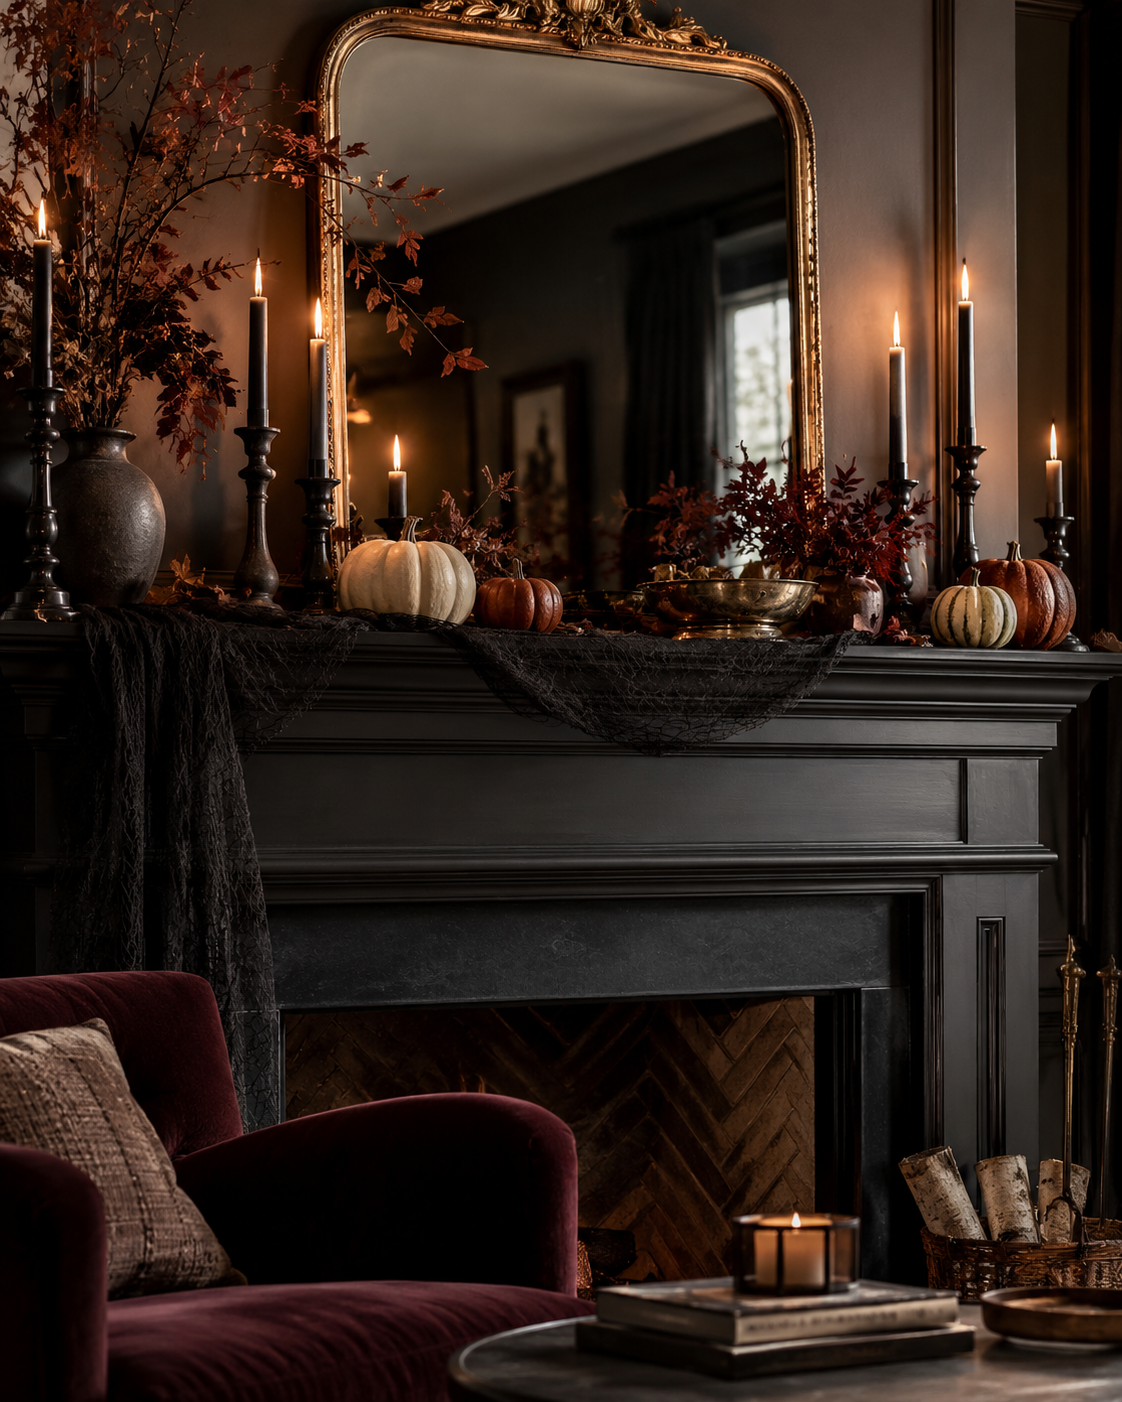
1. Matte Black Thrifted Candleholders
One of the fastest ways to make inexpensive Halloween decor look sophisticated is to use a consistent finish.
Visit a thrift shop and look for mismatched candleholders. Don’t worry about the original color. Brass, ceramic, wood, resin, and even some metal pieces can work beautifully once properly prepared for the appropriate paint.
Choose several different heights and shapes.
After cleaning them thoroughly, refinish suitable surfaces with matte black paint designed for that material. Once everything is the same color, the mismatched pieces suddenly look like an intentional collection.
Place them across your fireplace mantel, dining table, entryway console, or bookshelf.
Add black, ivory, or deep burgundy taper candles.
For displays surrounded by dried leaves, gauze, paper decorations, or other flammable materials, use flameless LED candles instead.
The combination of varied heights and one consistent finish can make inexpensive candleholders look surprisingly high-end.
2. Antique Gold Halloween Skulls
Those lightweight plastic skulls sold around Halloween can look a little… plastic.
Fortunately, paint is practically Halloween witchcraft.
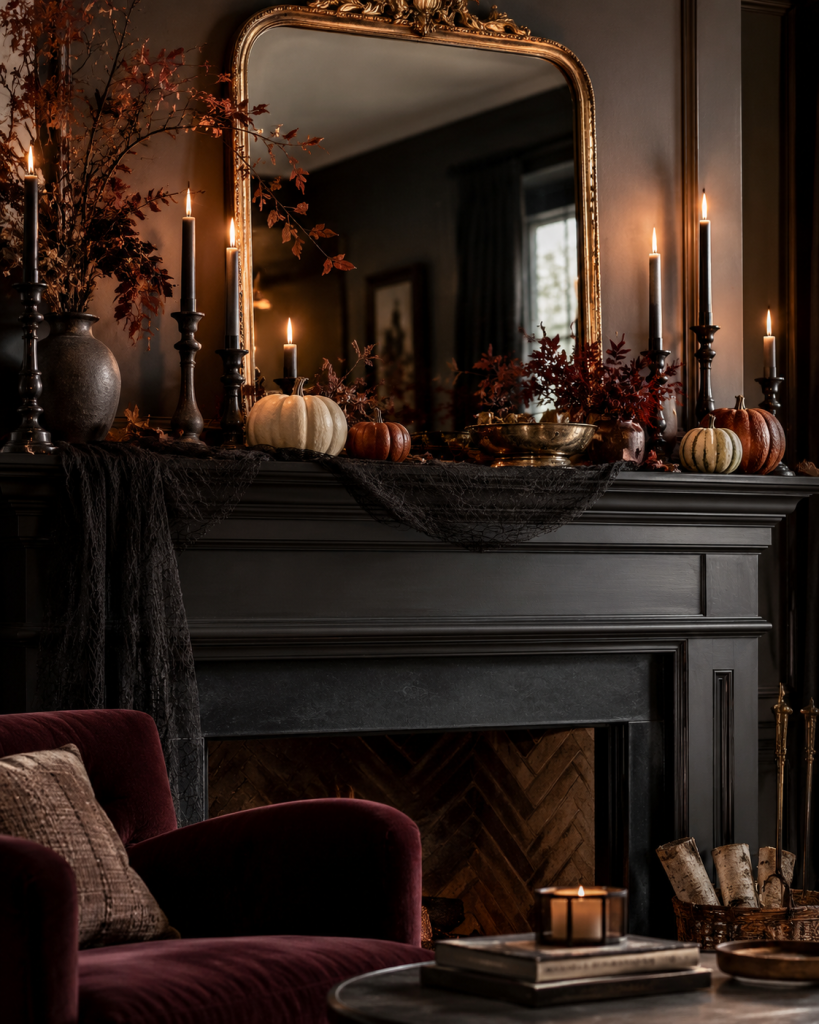
Choose inexpensive decorative skulls and give them an aged metallic finish using paint suitable for the material. Start with a dark base color, then lightly layer antique gold, bronze, or pewter over raised areas.
Don’t completely cover the darker color.
Leaving shadows around the eyes, cheekbones, and crevices creates depth and makes the piece look older.
Place one skull on top of a stack of vintage books, underneath a glass cloche, or beside dark flowers and candlesticks.
Suddenly your inexpensive plastic skull looks like something discovered in an eccentric collector’s library.
Whether that’s comforting is another question.
Decoratively speaking, though, we’re doing very well.
3. DIY Vintage Halloween Prints
Wall art can completely transform a seasonal room, but you don’t need to buy new framed artwork every October.
Use frames you already own or collect inexpensive ones from thrift stores.
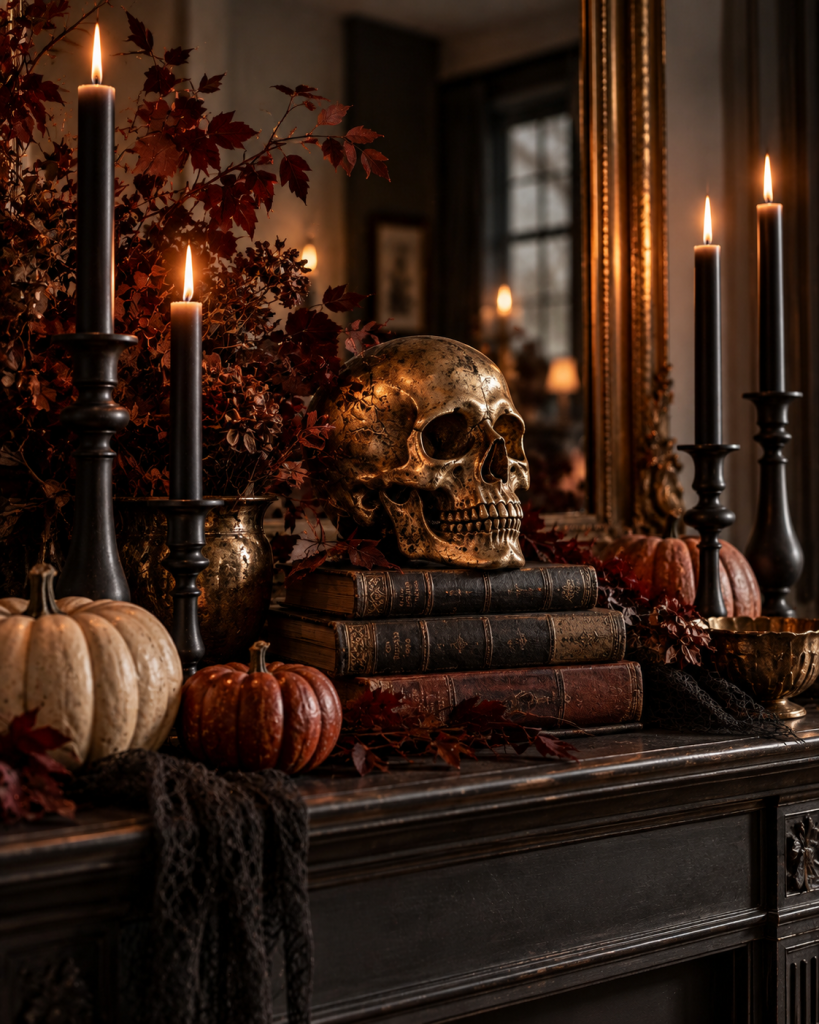
Create your own Halloween-inspired artwork using public-domain vintage illustrations, original designs, simple silhouettes, botanical drawings, moons, ravens, pumpkins, or old-fashioned typography.
Print them on slightly warm or cream-colored paper rather than bright white paper.
For an aged appearance, choose muted black, brown, rust, or sepia tones.
Place several frames together on a mantel or console table, or create a small Halloween gallery wall.
The secret is keeping the artwork visually connected.
A group of five random Halloween graphics can look chaotic.
Five coordinated prints using the same muted palette can look curated.
4. Painted Faux Pumpkins
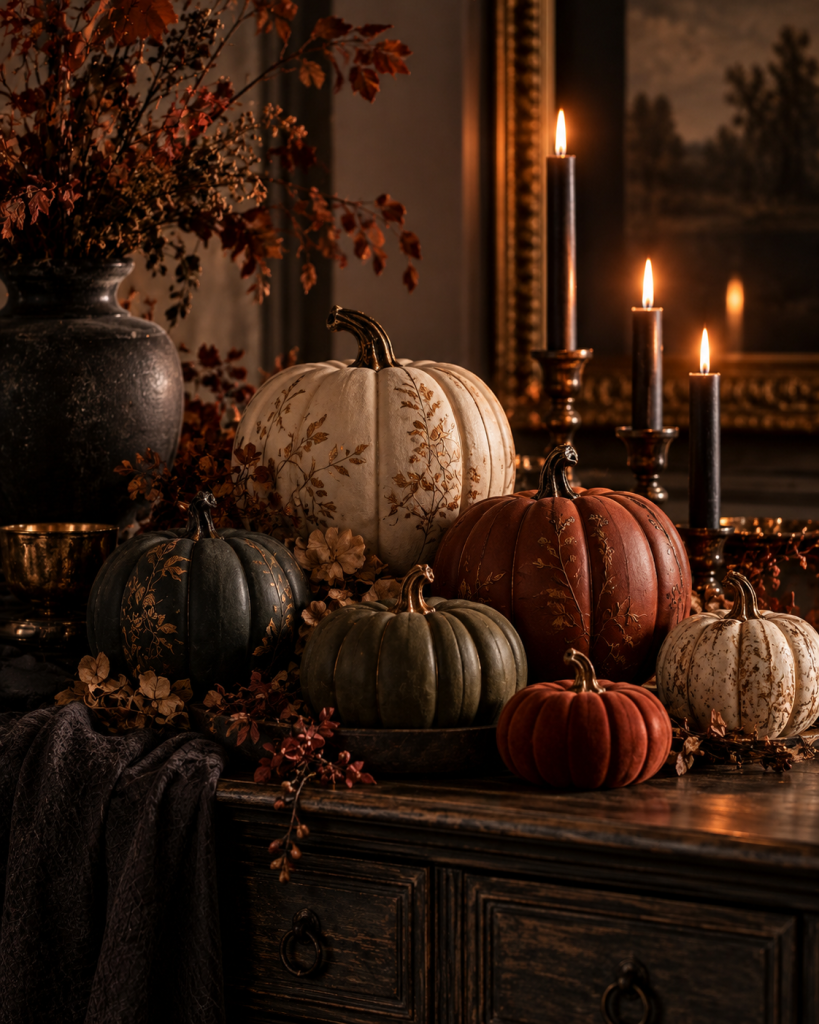
Plastic pumpkins are inexpensive, reusable, and wonderfully easy to transform.
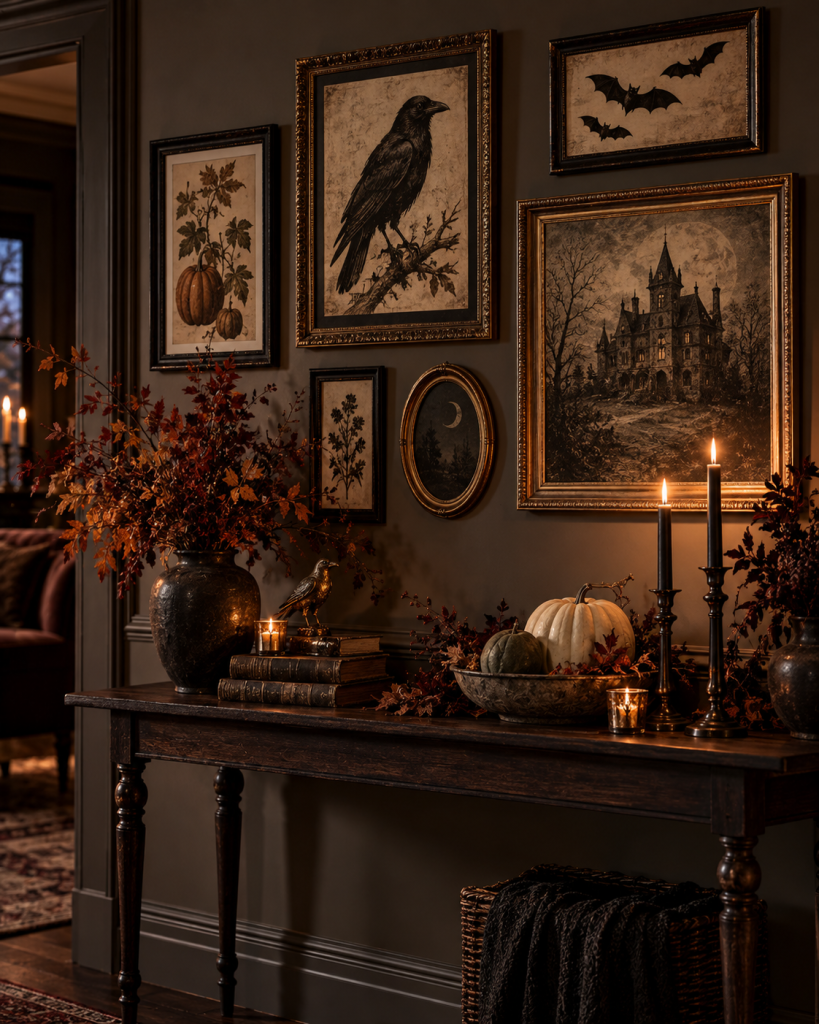
Instead of leaving them bright orange, repaint them in colors that fit your home.
Think:
Cream.
Warm white.
Taupe.
Terracotta.
Olive green.
Charcoal.
Muted orange.
Deep burgundy.
For additional dimension, use two similar shades rather than one perfectly flat color.
You can lightly brush a darker shade into the grooves and apply a softer highlight over the raised areas.
Replacing an obviously plastic stem can also make a huge difference. Depending on the pumpkin design, you might paint the existing stem or attach an appropriate natural-looking decorative stem securely.
Group several finished pumpkins together rather than scattering them around the room individually.
Five pumpkins in varying sizes often look more intentional than five pumpkins living separate emotional lives around the house.
5. Oversized Paper Bats
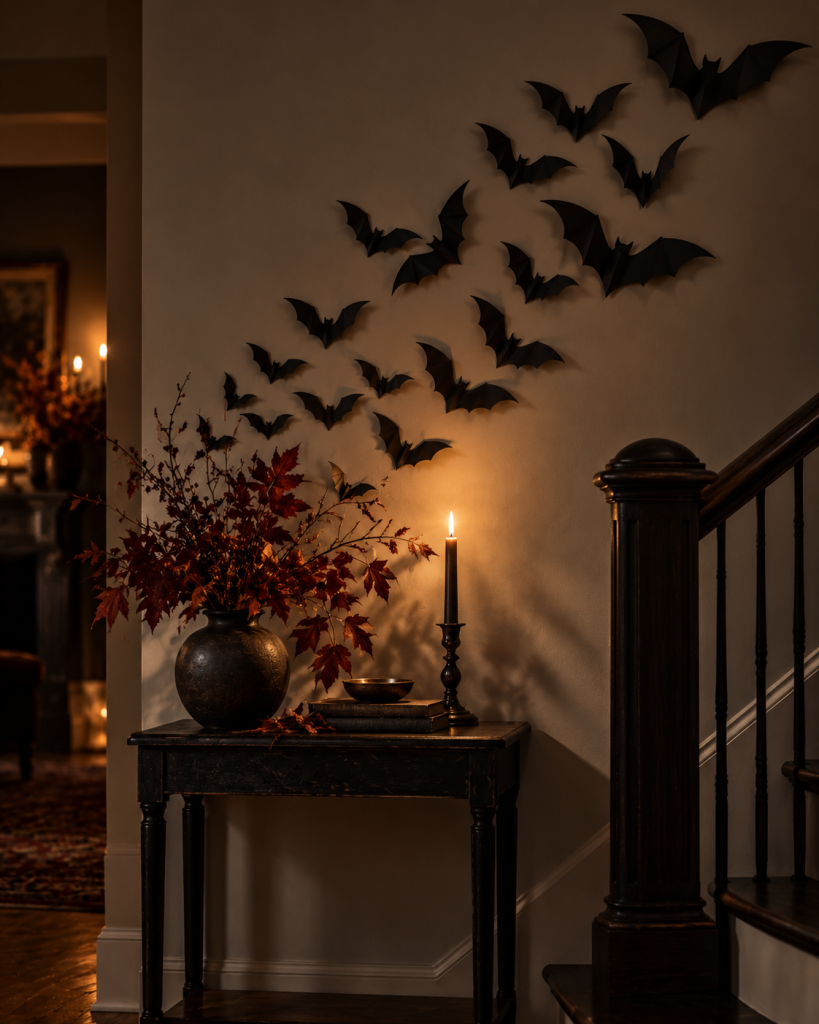
Paper bats are one of the cheapest Halloween decorations you can make, yet they can create enormous visual impact.
The key is scale.
Instead of making dozens of identical tiny bats, create several different sizes.
Use sturdy black cardstock and cut simple bat silhouettes. Slightly fold the wings forward so each bat becomes three-dimensional.
Then arrange them across a large wall, staircase, fireplace, doorway, or mirror.
Create movement by positioning them as though they’re flying toward one direction.
Start with larger bats and gradually transition toward smaller ones.
That simple change makes the display feel far more intentional.
And because they’re lightweight, they can be stored flat and reused next Halloween.
6. Moody DIY Halloween Wreath
An elaborate seasonal wreath can easily become one of the most expensive Halloween decorations on your door.
Making your own can produce an equally dramatic result.
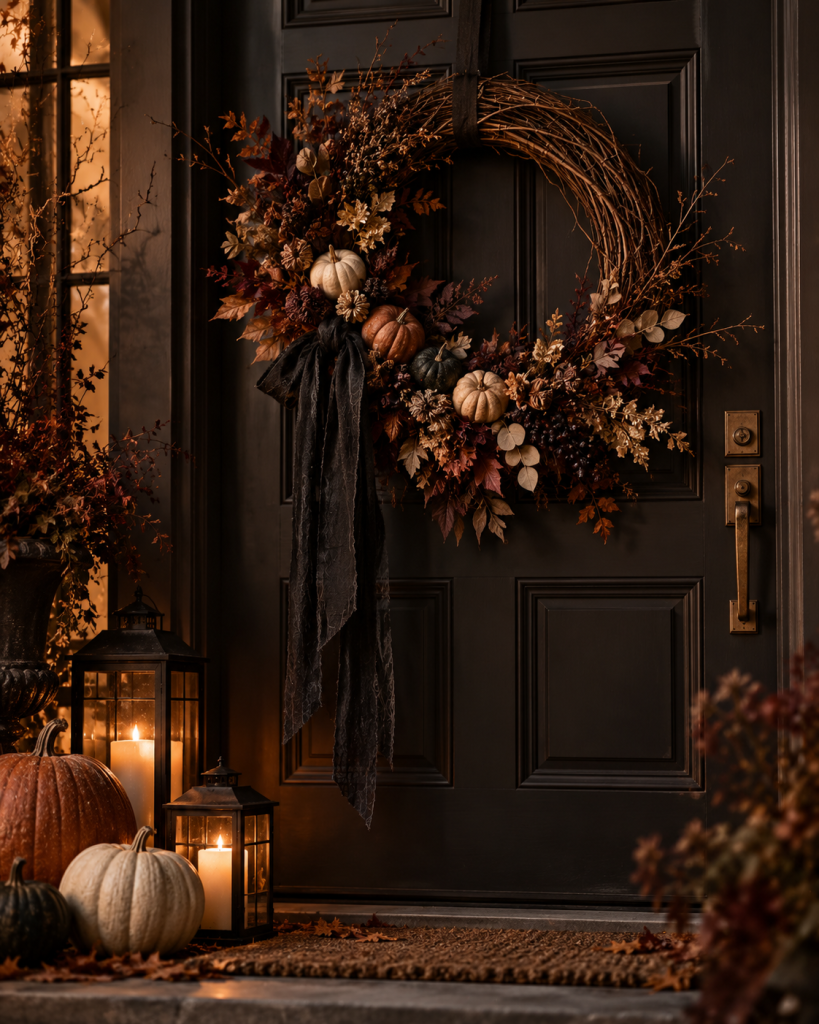
Start with a grapevine wreath.
Add dried or faux foliage in a restrained palette such as deep burgundy, brown, burnt orange, black, or muted green.
Then incorporate a few Halloween details.
Try small pumpkins, ravens, bats, dark berries, miniature skulls, feathers, or a black velvet ribbon.
Resist the urge to attach everything you own.
Negative space helps a wreath look more sophisticated.
A dramatic ribbon hanging from one side can also give the design a luxurious appearance without requiring much additional material.
7. Black Branch Centerpiece
This project might cost almost nothing.
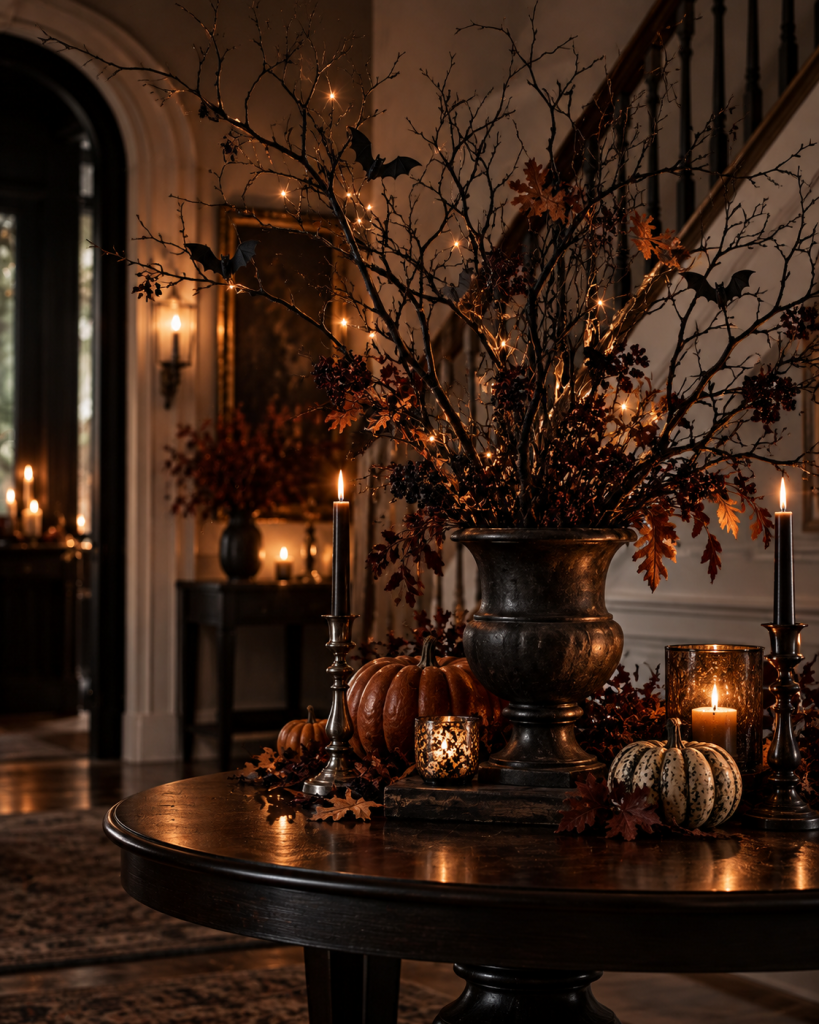
Collect attractive fallen branches from somewhere you’re legally permitted to gather them, or use inexpensive decorative branches.
Make sure natural materials are clean, dry, pest-free, and suitable for bringing indoors.
Place the branches inside a heavy vase or urn.
You can leave them natural for a rustic look or refinish suitable branches in matte black for a stronger Halloween effect.
Add a few lightweight hanging bats, miniature ravens, or subtle fairy lights.
The finished arrangement works beautifully on an entryway console, dining buffet, fireplace hearth, or table.
Height is one of the easiest ways to make decor feel dramatic, and branches give you plenty of it without filling every horizontal surface.
8. DIY Aged Terracotta Pumpkins
If you love earthy interiors, try giving inexpensive pumpkins an aged pottery appearance.
Paint faux pumpkins in terracotta, clay, beige, or warm brown.
Then create subtle texture using a technique appropriate for your paint and surface. Instead of making the finish perfectly smooth, allow a little variation.
After everything dries, gently layer lighter and darker earthy tones around the grooves.
You want the pumpkins to look like old ceramic or weathered pottery rather than freshly painted plastic.
Display them with linen, dried foliage, dark wood, and warm candles.
This works especially well if traditional orange-and-black Halloween decor feels too intense for your home.
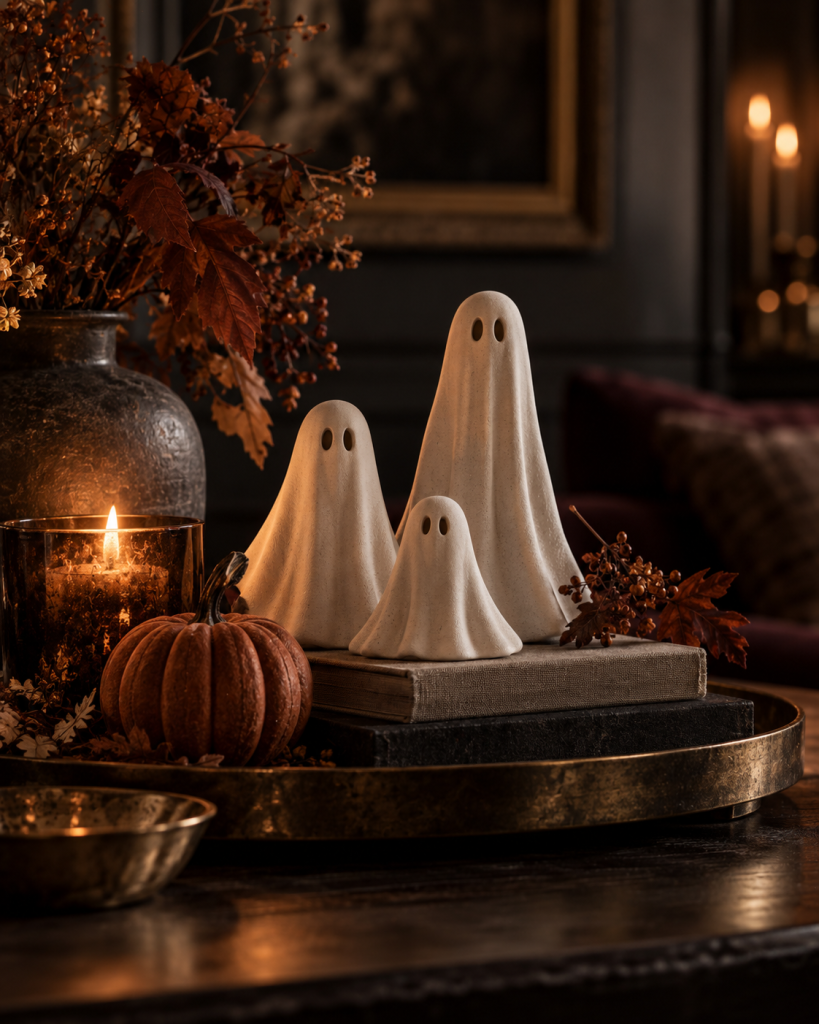
9. DIY Ghosts That Look Like Ceramic
Cute ghost figurines are everywhere during Halloween, but you can make your own.
Depending on your preferred crafting method, use air-dry clay or another suitable moldable craft material to create simple ghost shapes.
Don’t worry about making them perfectly symmetrical.
Slight irregularities can make handmade pieces feel charming and collected.
Create tiny eyes and mouths, allow the material to dry or cure according to its instructions, and finish the surface appropriately.
A soft matte white or warm ivory can give the ghosts a ceramic-inspired appearance.
Create three in different sizes and arrange them on books or a tray.
Minimalist ghosts work beautifully because they’re recognizable without being visually overwhelming.
They’re spooky in the politest possible way.
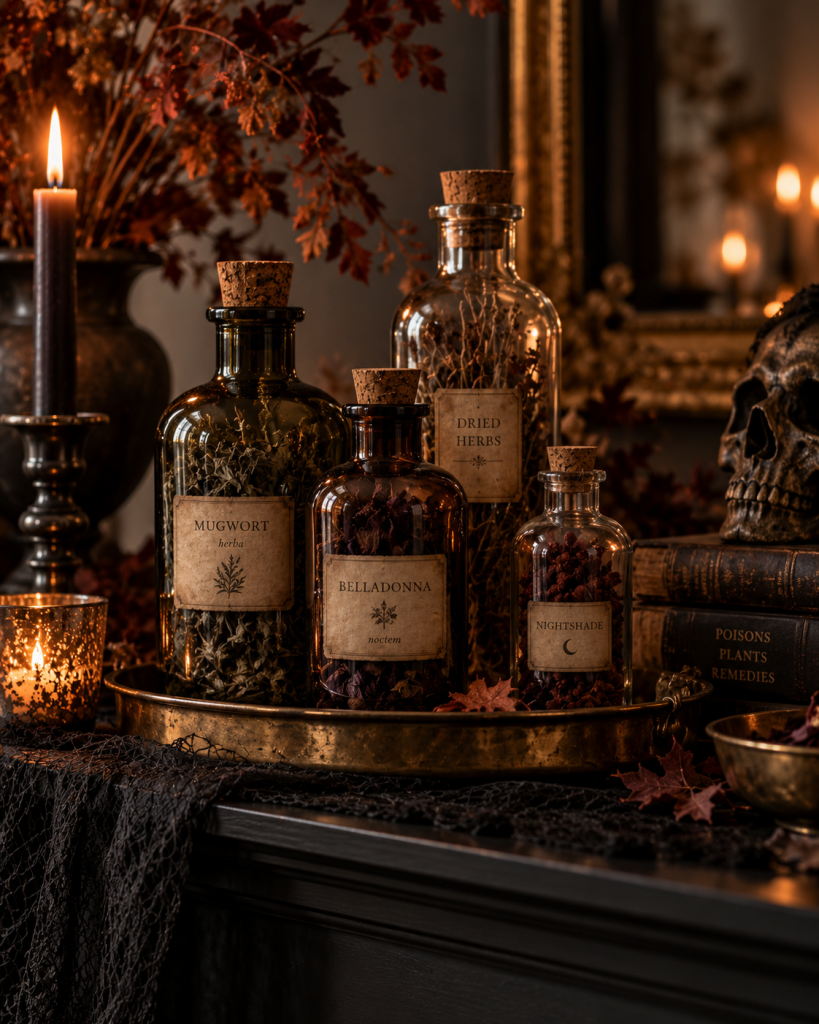
10. Apothecary Bottles From Recycled Glass
Save interesting glass bottles and jars instead of throwing them away.
Remove the labels thoroughly and clean everything.
Then transform the bottles into vintage-inspired Halloween apothecary decor.
You can add original labels with playful names such as:
Moon Dust
Midnight Elixir
Witch’s Garden
Ghostly Tonic
Potion No. 13
Keep the labels simple and slightly aged rather than brightly colored.
Fill bottles with safe decorative materials such as colored water for temporary displays, dried herbs, artificial botanicals, beads, or other nonhazardous craft materials.
If you’re using liquid, make sure the container is watertight and placed somewhere children and pets won’t mistake it for something drinkable.
Arrange several bottles on a wooden tray beside candles and dried flowers.
Instant witchy apothecary.
No actual potion brewing required.
11. Black Lace Candle Jars
Save small glass jars and turn them into Halloween lanterns.
Wrap black lace, sheer fabric, or decorative cutout paper around the outside of each clean jar.
Secure it neatly so seams aren’t obvious.
Place battery-operated tea lights inside.
When illuminated, the pattern becomes much more dramatic.
Make several and group them together on a mantel, staircase landing, entry table, or dining table.
The glow coming through the black pattern creates an elegant Gothic effect.
Using flameless candles also means you can safely incorporate fabric, paper, dried flowers, and other decorative materials without placing them near an open flame.
12. DIY Velvet Pumpkins
Velvet instantly makes Halloween decor feel luxurious.
To create your own fabric pumpkins, use velvet or another plush fabric in rich seasonal colors.
Deep olive.
Rust.
Wine.
Black.
Chocolate brown.
Cream.
Muted gold.
Form the fabric around soft filling and secure it into a pumpkin shape using a suitable sewing or no-sew crafting method.
Add a decorative stem in the center.
The finished pumpkins look especially beautiful grouped inside a shallow wooden bowl or arranged across a mantel.
Mixing two or three complementary colors usually looks more elegant than using every available color.
Sometimes expensive-looking decor is simply decor that knows when to stop.
13. Faux Stone Pumpkins
Here’s another way to completely disguise an inexpensive pumpkin.
Give it the appearance of carved stone.
Start with a faux pumpkin made from a material compatible with your chosen paint.
Use layered gray, beige, taupe, or limestone-inspired tones.
Add subtle darker areas into the grooves and lighter highlights along raised surfaces.
The finish should look imperfect and slightly weathered.
Place the finished pumpkins beside concrete planters, stone-colored pottery, dried foliage, or black lanterns.
This technique can work particularly well for outdoor covered areas when all chosen materials and finishes are rated for the conditions they’ll experience.
14. DIY Haunted Portrait Gallery
Transform ordinary portrait frames into an elegant haunted gallery wall.
Collect inexpensive frames in different sizes.
Paint or refinish suitable frames in black, dark brown, aged gold, or antique bronze.
Then fill them with original Halloween portraits, public-domain historical imagery, silhouettes, mysterious landscapes, botanical illustrations, or vintage-inspired artwork.
Keep the color palette muted.
Instead of filling an entire wall, create a concentrated arrangement above a console table or beside the staircase.
Add a small lamp or a few flameless candles nearby.
Lighting is what takes this from “Halloween prints in frames” to “I suspect this house has secrets.”
15. DIY Black Floral Arrangement
Flowers aren’t just for spring.
Dark florals can create one of the most dramatic Halloween centerpieces.
Choose faux or dried botanicals in shades such as:
Burgundy.
Black.
Deep plum.
Rust.
Brown.
Muted orange.
Cream.
Combine them with branches, dried grasses, eucalyptus tones, or dark leaves.
Place everything inside an old ceramic vase, metal vessel, or glass container you’ve refinished.
Don’t make the arrangement too compact.
Allow some branches and flowers to extend outward so the arrangement feels organic.
Use it on your dining table, fireplace, kitchen island, or entryway console.
16. Floating Witch Hats
Few DIY decorations create this much impact with so little actual work.
Choose lightweight witch hats and suspend them using appropriate clear hanging line and secure attachment methods.
Hang the hats at different heights.
A hallway, staircase, covered porch, or dining area works particularly well.
Avoid creating one perfectly straight row.
Different heights create movement and make the display feel more magical.
If you want illumination, only use lightweight battery-operated lights that are suitable for the material and application.
And make absolutely sure every hat is securely attached.
Floating witch hats are fun.
Falling witch hats attacking dinner guests are considerably less sophisticated.
17. DIY Spiderweb Mirror
A large mirror is already dramatic.
Halloween just gives us permission to make it slightly suspicious.
Create a removable spiderweb design across part of the mirror using a material specifically suitable for temporary application to glass.
Keep most of the mirror uncovered.
An asymmetrical web extending from one corner often looks more stylish than covering the entire surface.
Add one or two realistic-looking decorative spiders.
If the mirror sits over a console table, continue the theme below with black candleholders, pumpkins, and branches.
This creates one strong Halloween moment instead of filling the entire room with decorations.
18. DIY Ghost Candles
Ordinary pillar candles or flameless candles can become cute ghost decorations with a few simple additions.
For reusable LED versions, add removable ghost faces using a surface-safe method.
Group several different heights together.
The taller ones naturally look like adult ghosts and the shorter ones like tiny ghost children following them around the house.
Which sounds adorable until you think about it too deeply.
Place them on a tray with small pumpkins and dried leaves.
For Halloween decorations displayed around fabric, paper, greenery, or children, flameless versions are especially practical.
19. Painted Halloween Village Houses
Miniature holiday villages don’t have to belong exclusively to Christmas.
Look for inexpensive miniature houses at thrift stores, craft shops, or among old decorations you already own.
Refinish suitable pieces in one coordinated Halloween palette.
Matte black looks dramatic.
Charcoal, warm gray, stone, cream, or dark burgundy can also work.
Add subtle details such as tiny pumpkins, moss, miniature trees, or warm battery-operated lighting where appropriate.
Arrange several houses together on a mantel or sideboard.
The monochromatic finish helps unrelated pieces look like one intentional collection.
You have now created an entire haunted property portfolio.
Very impressive.
20. Halloween Book Covers
Books are fantastic styling tools because they create height and layers.
Instead of buying decorative Halloween books, temporarily cover books you already own.
Use removable paper covers and add original titles such as:
The Haunted House
Ghost Stories
October Nights
Midnight Tales
The Witching Hour
Keep the typography simple and use black, brown, cream, rust, or burgundy paper.
Stack three or four books beneath a ceramic ghost, skull, pumpkin, or candleholder.
After Halloween, remove the covers and your normal books return unharmed.
It’s inexpensive, reusable, and especially good for shelves and coffee tables.
21. DIY Aged Brass Bells
Small bells can bring a wonderful old-world feeling to Halloween decor.
Look for inexpensive decorative bells and, if necessary, refinish them with an antique brass effect appropriate for their material.
Rather than making the metallic finish perfectly shiny, keep it slightly aged.
Tie several bells onto dark ribbon or natural twine and hang them from an interior doorknob, wreath, or decorative hook.
Pair them with dried foliage and vintage-inspired pieces.
It’s subtle Halloween decorating, which can be especially beautiful if you don’t want ghosts and pumpkins covering every surface.
22. DIY Pumpkin Candle Centerpiece
Create a dramatic dining centerpiece using pumpkins and varying candle heights.
Start with a runner made from linen, gauze, or another textured fabric.
Arrange several pumpkins along the center.
Add candleholders between them, varying the height.
Then tuck in dried leaves, berries, branches, or greenery.
The key is keeping the arrangement relatively low in areas where people need to see across the table.
For a moody palette, combine black candles with cream pumpkins and dark foliage.
For something warmer, use rust-colored pumpkins, ivory candles, and natural greenery.
Use flameless candles whenever nearby materials make open flames inappropriate.
Once the lights are dimmed, even inexpensive materials can suddenly look dramatically more luxurious.
23. DIY Faux Antique Books
If you’re willing to devote a little more crafting time, transform inexpensive decorative boxes or thrifted books into antique-inspired Halloween display pieces.
Create aged-looking covers using textured paper, safe craft paint, decorative trim, or other suitable materials.
Keep the titles subtle.
You might use:
Botanical Studies
Nocturnal Creatures
Collected Folklore
Autumn Almanac
Old World Remedies
The goal isn’t to create something cartoonishly spooky.
You want pieces that could plausibly belong in an eccentric old library.
Stack them on a mantel or console table with a raven, brass candleholder, magnifying glass, or dried flowers.
24. Oversized Cheesecloth Ghost
Small ghosts are cute.
An enormous ghost standing quietly in the corner?
Now we’re decorating.
Create a stable structure using lightweight craft materials, then drape white fabric or cheesecloth over it.
Shape the material so it appears to flow naturally rather than hanging like a bedsheet.
Depending on your chosen method, fabric stiffener can help certain materials retain shape.
Keep facial features minimal or skip them altogether for a more elegant appearance.
Place the finished ghost in an entryway, covered porch, living-room corner, or beside a fireplace.
One oversized decoration often looks more intentional than ten tiny decorations spread everywhere.
Scale creates impact.
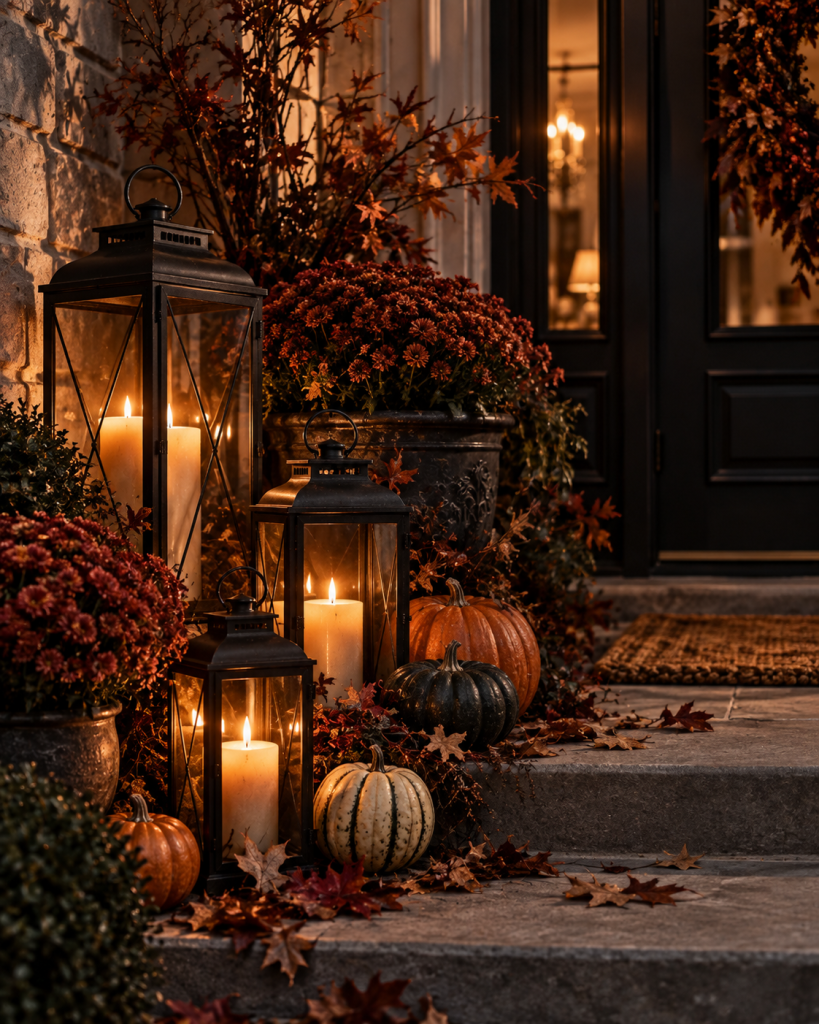
25. DIY Halloween Lantern Display
For our final project, create a collection of lanterns that can work indoors or in an appropriately sheltered outdoor location.
You can repurpose existing lanterns, thrift inexpensive ones, or refinish suitable pieces to create a coordinated look.
Matte black is classic, but antique bronze, aged brass, and weathered wood can also look beautiful.
Fill the lanterns with flameless candles.
Then arrange several sizes together with pumpkins and foliage.
Instead of placing lanterns symmetrically, try clustering three together at slightly different heights.
That layered arrangement gives the display more depth.
Use them beside the fireplace, underneath an entry table, along a covered porch, or near the front door.
At night, the warm glow does most of the decorating for you.
The Secret to Making DIY Halloween Decor Look Expensive
You may have noticed something.
Almost none of these projects require expensive materials.
The difference comes from a handful of styling decisions.
First, limit your color palette.
Choose three or four main colors and repeat them throughout your home.
For example:
Black + cream + rust + natural wood
Or:
Burgundy + charcoal + brass + brown
Or:
Terracotta + olive + cream + black
Using fewer colors helps unrelated pieces feel connected.
Second, vary the height and scale of your decor.
Place tall branches behind medium-sized pumpkins and smaller candleholders. Layer items instead of arranging everything in a straight line.
Third, choose matte, aged, natural, or textured finishes when you want a more elevated result.
Glossy plastic tends to reveal that something was inexpensive. Matte paint, wood, stone-like texture, fabric, metal finishes, and natural foliage generally blend more easily into a home.
Finally, don’t fill every surface.
A beautifully styled mantel and entryway can create more impact than fifty Halloween decorations spread across every room.
Use Lighting to Make Everything Look Better
Lighting might be the most underrated Halloween decorating trick.
During the day, you might look at a DIY project and think:
“That’s nice.”
Turn off the overhead lights, switch on a few lamps, add warm fairy lights and flameless candles, and suddenly:
“Oh.”
That’s the magic.
Warm pools of light create shadows, texture, and depth. They also make darker colors such as burgundy, charcoal, brown, and black feel cozy rather than gloomy.
Try illuminating decorative areas from several smaller sources instead of relying only on one bright ceiling fixture.
Lanterns near the floor, candles on a mantel, fairy lights around branches, and a warm table lamp can completely transform a room.
Shop Your Home Before Buying Craft Supplies
Before purchasing anything, take a little tour around your house.
Look for items that could temporarily become Halloween decor.
Old glass bottles?
Apothecary display.
Black picture frames?
Halloween gallery wall.
Wooden bowl?
Pumpkin display.
Tall vase?
Black branch centerpiece.
Unused books?
Halloween book stacks.
Glass jars?
Candle lanterns.
Blanket?
Layer it beneath a Halloween pillow.
You might already own half the materials you need.
That’s one of my favorite things about DIY seasonal decorating. You start looking at ordinary objects differently.
Suddenly nothing is safe.
Even an empty pasta-sauce jar has career opportunities.
Check Thrift Stores Before Buying New
Thrift stores can be gold mines for Halloween decorating.
Instead of looking specifically for Halloween objects, look for shapes and materials.
Search for:
Candleholders.
Frames.
Wooden bowls.
Glass bottles.
Vases.
Old books.
Lanterns.
Decorative boxes.
Trays.
Mirrors.
Baskets.
Small furniture pieces.
The original color doesn’t always matter because many objects can be safely refinished using products designed for their materials.
A strange brass candleholder from 1998 might look completely different after a thoughtful update.
This is also a wonderful way to create decor that doesn’t look identical to whatever everyone else bought that year.
Give Everything Room to Breathe
This is probably the simplest expensive-looking decorating trick of all.
Don’t use everything.
I know.
Painful.
But beautifully designed spaces usually contain intentional empty areas.
Instead of lining fifteen small objects across a mantel, create three larger visual groupings.
Rather than distributing pumpkins evenly throughout the room, cluster them together.
Instead of hanging Halloween decorations on every wall, create one dramatic focal point.
When everything gets equal attention, nothing really stands out.
Give your favorite DIY creations some breathing room and let them become the stars.
Your ceramic ghost has worked hard for this moment.
Let him have it.
Final Thoughts
Making beautiful Halloween decorations doesn’t have to involve spending hundreds of dollars on seasonal decor.
With a little creativity, we can transform thrifted candleholders, glass jars, paper, branches, fabric, inexpensive pumpkins, and ordinary household items into decorations that look far more luxurious than their price tags suggest.
The biggest difference usually comes from the finishing touches.
Use cohesive colors.
Mix textures.
Vary heights.
Choose warm lighting.
Group decorations rather than scattering them.
And don’t be afraid to repaint something inexpensive.
Halloween is one of the best seasons for DIY decorating because a little imperfection can actually make everything more interesting.
After all, an antique-looking candleholder probably shouldn’t look factory fresh.
A haunted book doesn’t need perfectly straight edges.
And your handmade ghost can be slightly crooked.
He’s been through a lot.
So choose a few of these DIY Halloween decorations, turn on some cozy fall music, make yourself something warm to drink, and start creating.
Your home can look wonderfully spooky and surprisingly expensive without your wallet experiencing its own horror story.
